Giant Twist Express 2 Hub Motor Repair
Abstract
Replacement of worn plastic planetary and ring gears on a Giant Twist Express 2 e-bike hub motor.
Introduction
I recently acquired a second-hand Giant Twist Express 2 e-bike with a failed hub motor. When pedalling and applying power to the hub motor, it would make a grinding noise and provide no traction. Troubleshooting tests from the owner's manual showed the motor's hall sensors and the controller's torque sensor to be ok. Stripping of the motor showed badly worn gear teeth on the black plastic planetary and ring gears. Inspection of the planetary gears showed that they were worn on their spindle axes so that they could rock on the spindles. This reduced their contact area with the ring gear and the ridges of the gear teeth were worn/broken off.
Identifying the problem
Symptoms of this problem were a grinding noise when applying power and no traction. With the noise coming from the motor itself, I was happy that the controller was working correctly but I conducted the available troubleshooting tests from the giant owner's manual:
Controller torque sensor test.
For this test, press and hold the 'giant logo' button on the control board while powering on. This sets the bike in test mode. One of the middle three lights of the battery level meter will light. Now squeeze both brake levers and press down on a pedal. The battery level meter will light up according to the pressure applied to the pedal.
Motor hall sensor test.
With the bike in test mode, rotate the front wheel backwards. The middle three lights of the battery level meter will light in succession as the wheel rotates. Each light indicates one of the three hall sensors in the motor. A failed sensor will fail to light the meter.
Strip for inspection.
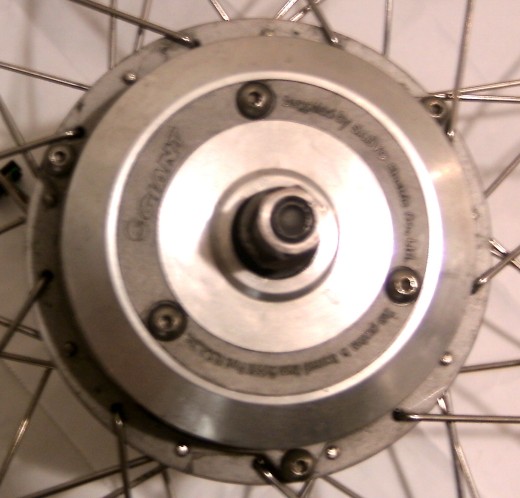
With these tests passed, it became necessary to strip the motor for inspection. Access to the motor is simple enough, removal of three bolts (Fig:
1) allows the motor to be withdrawn from the hub shell.
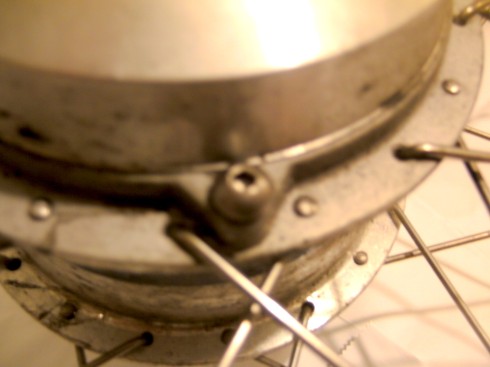
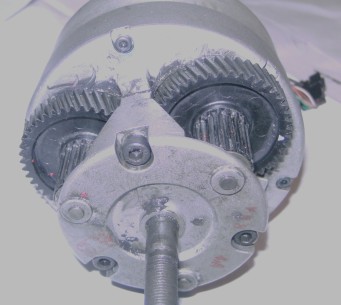
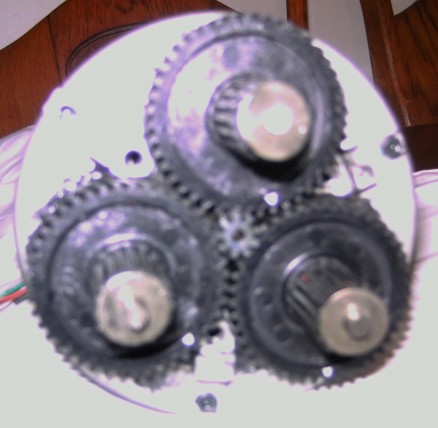
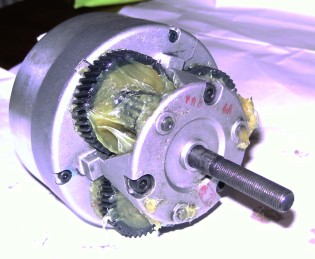
Removal of the freewheel shell and ring gear shell exposed badly worn planetary gears (Fig:
2). I then removed the gear carrier and noted that the planetary gears rocked on their spindles which presumably contributed to tooth wear. The teeth on the inside of the ring gear were similarly worn. The sun gear on the motor axle looked fine as did all bearings. The fix is to replace these worn gears.
The search for parts
My first port of call was my local bicycle shop. They made contact with Giant UK who could/would not sell me the parts. Their only offer was a new wheel for around €250-300. Needless to say, I declined their offer. Next stop was ebay, nothing to be found there apart from one or two second-hand motor hubs in the USA. Postage was going to be prohibitive for these and I would end up spending nearly €200 for parts that I would not be sure would last all that long. General google searches for 'Giant e-bike hub motor gears', 'Giant e-bike planetary gears' and various other searches turned up nothing.
Finally, after months of searching, having given up hope of finding parts, I asked the good folks on the
UK Pedelecs forum for suggestions on a replacement motor. User shemozzle999 pointed me to
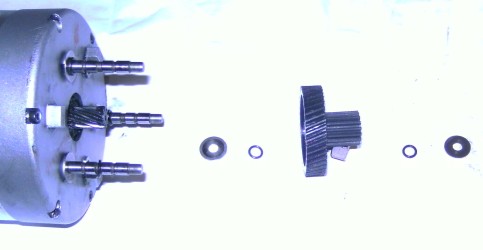
these gears on aliexpress.com at a cost of €15!
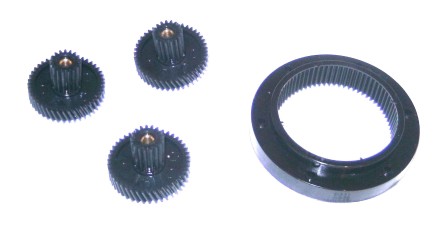
The gears took about a month to arrive and, on inspection, appear to have a brass bush in the planetary gears which should make tooth wear less likely (Fig:
3).
Dismantling the motor
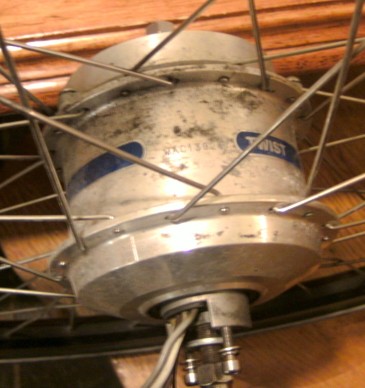
First, remove the wheel from the bicycle (Fig:
4), two socket cap bolts through the motor torque plate, two electrical connectors (white three wire power and black six wire hall sensors) and the standard axle nuts.
Open the hub by undoing three socket cap bolts (Fig:
5) and the motor can be pulled from the hub shell. Note: the three inner socket cap bolts retain the freewheel ratchet ring to the hub shell. These do not need to be disturbed.
Description
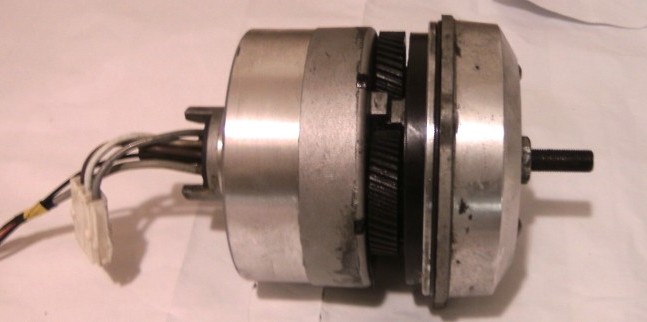
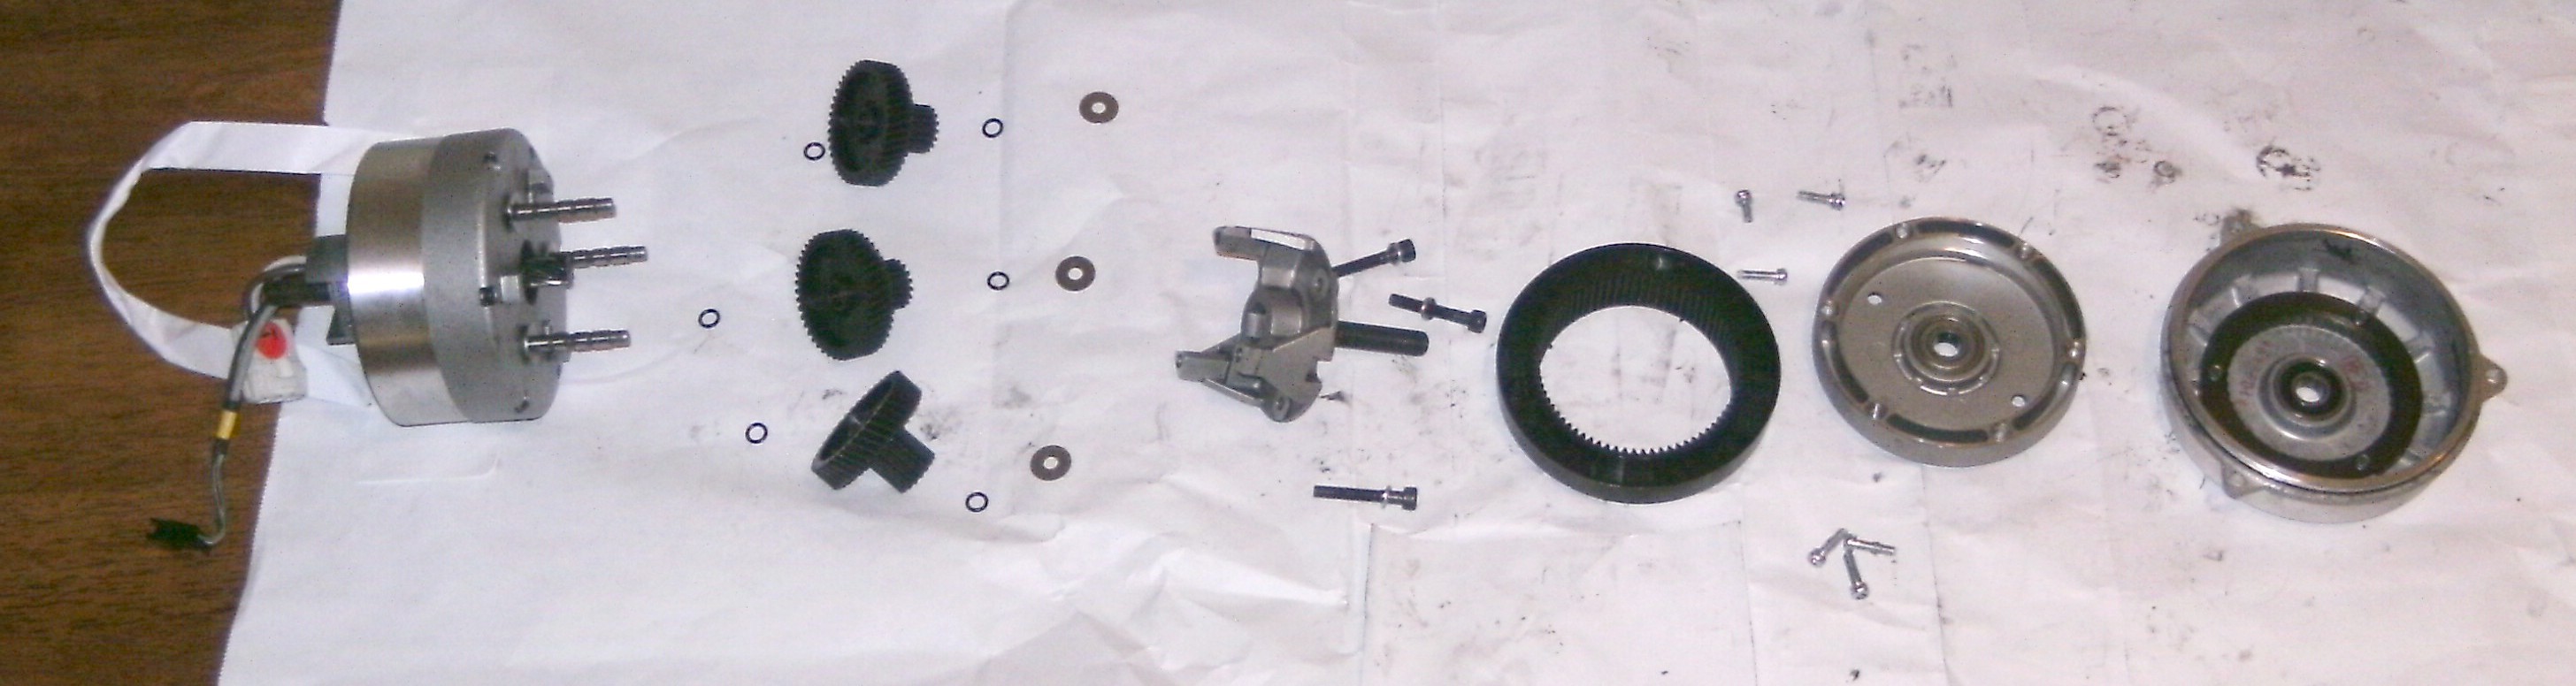
The motor assembly (Fig:
6) consists of: motor, planetary gears and carrier, ring gear and shell, freewheel ratchet and shell. The body of the motor and the planetary gear carrier remain stationary and make up the axle of the wheel while the planetary gears are driven by the motor and, in turn drive the ring gear and thence the freewheel shell. The freewheel shell is the outer right plate of the wheel hub.
Stripping
Remove a 17mm nut to release the freewheel and ring gear shells. Note the position of various washers around the bearings. Check the bearings for rocking or rough running. Check the state of the teeth of the freewheel ratchet on the inside of the shell. Check the state of the pawls and their retaining ring on the ring gear shell.
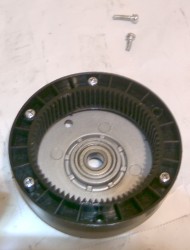
Pull the ring gear shell off the motor. There is no washer between the ring gear shell and the planet carrier. The teeth on the inner side of the ring gear were badly worn. The tips of the teeth had been worn off and debris could be seen inside the ring.
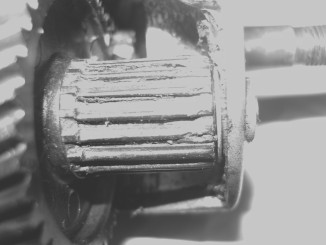
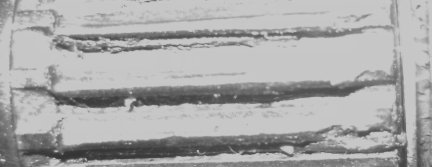
Inspection of the planetary gears revealed severe wear of their teeth (Fig:
7). The original size of the teeth can be seen at left of the figure.
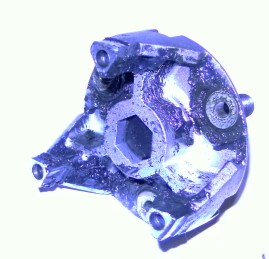
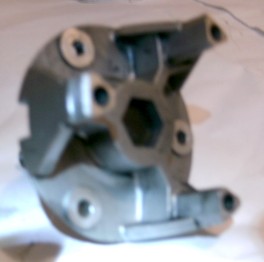
The planet carrier is removed by opening three socket cap bolts (Fig:
8) and gently prying off the motor body. Take care to recover thrust washer and two o-rings from each of the planetary gear shafts. The planetary gears can then be pulled off their shafts. It wasn't clear to me if the original planetary gears had brass bushings or was the plastic just bearing against the shafts but they were fairly worn such that the gears would rock on the shafts.
The ring gear is separated from its shell by removal of six pozidriv head bolts. These were quite tight and were also somewhat bent (presumably due to the torque of the motor). I had to break up the old ring gear to get a vice-grip pliers onto the heads of these bolts and ended up having to replace them with new bolts.
I did not strip the motor itself, it's brushless and appears to run quietly. All bearings appeared to be in good condition so I left these alone also.
Cleaning
With the damage to the gears having generated a lot of debris, it was necessary to thoroughly clean all parts of old grease and debris. I just used rags and baby wipes.
Rebuilding the motor
Reassembly
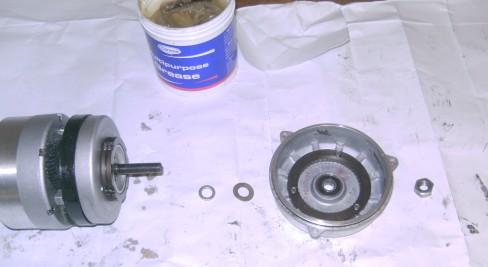
With everything nice and clean, reassembly is just the reverse of disassembly (Fig:
10).
First grease the motor sun gear and planetary shafts. I used ordinary all purpose grease. Only time will tell if this dissolves plastic motor parts...
The planetary gears themselves were subjected to a generous coat of grease before reassembling onto the shafts (Fig:
11).
The planetary carrier was then greased and fitted. Tighten the retaining bolts down evenly as the fit is quite tight (Fig:
12).
The ring gear was mounted to its shell, greased and slid onto the planetary carrier half-axle (Fig:
12). Note the missing bolts which were destroyed at removal. I had to hunt down new bolts for this.
The freewheel shell and its washers were slid onto the half-axle and bolted in place (Fig:
13).
Before refitting the motor into the wheel hub, I mounted it in the forks to test (Fig:
14).
Finally, the motor is refitted into the wheel hub. At this point, I discovered that the hub threads were damaged and I had to replace the retaining bolts with longer versions which would engage the remaining threads.
Back in action
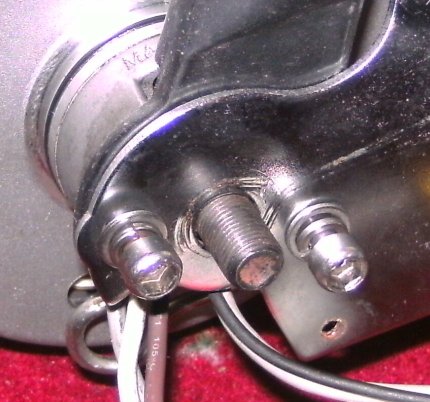
With the motor repaired, I re-fitted the front wheel. This wheel has no torque arm, instead, the motor housing includes a U-shaped section which wraps around the fork end and bolts to a retaining plate on the other side of the fork (Fig:
15).
I replaced a pair of front brake blocks, a gear cable and fitted a new connection cover on the front fork.
Testing
I took the bike out for a short test spin just to see that there were no issues. All appeared fine.
I then used it on my commute for a couple of days and achieved 50km range in eco mode on a fairly flat route (just a small hill or two along the way) between both windy and calm days.
Conclusion
This motor is pretty easy to access and easy to repair once you can source the relevant parts. Thanks to the folks at pedelecs.co.uk for friendly and prompt advice...